Valentines Tea Truffles

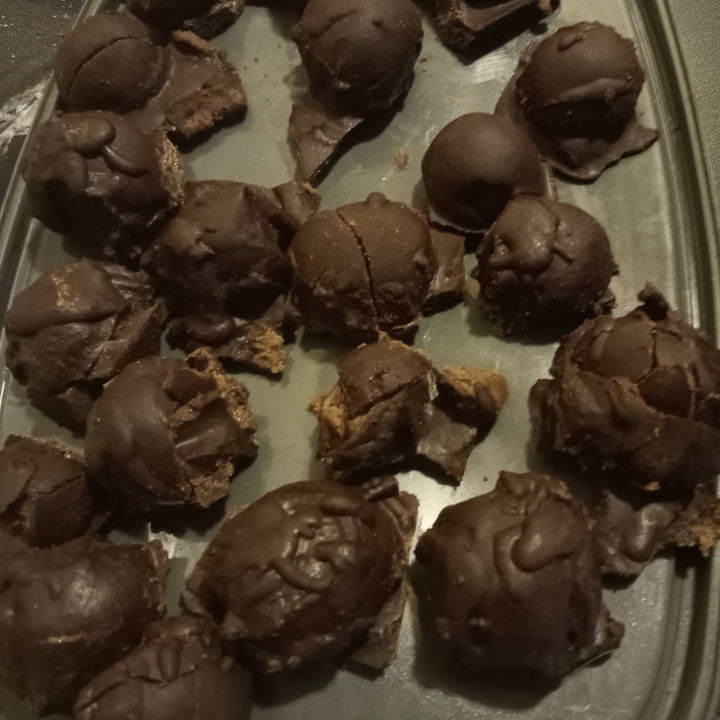
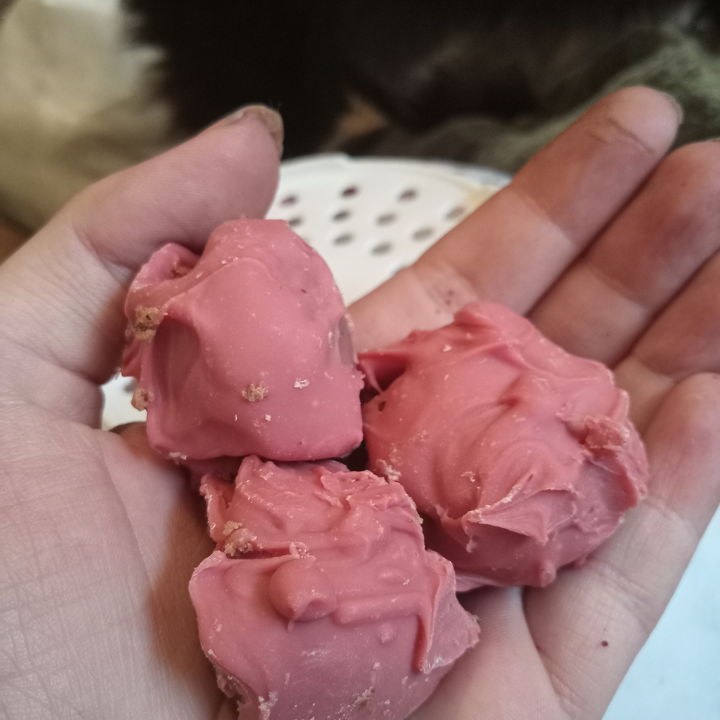
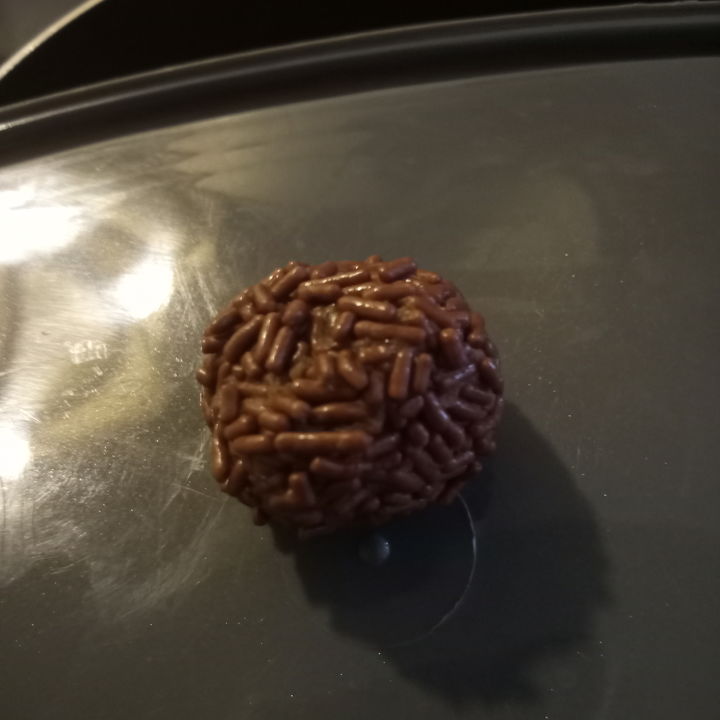
Homemade chocolate is easier to make than you probably think it is. Even fancy, expensive-tasting truffles. These decadent chocolate truffles have your favorite kind of chocolate on the outside - I used ruby chocolate, and also experimented with a milk/dark hybrid, but when you make yours, you'll get to choose! Whatever you choose, it will be enrobing a bunch of sweet, creamy, Valentines tea-flavored ganache centers. They are equally perfect for sharing with a loved one or indulging yourself. (And they go very well with the tea they're flavored with, especially if you add milk and sugar to the tea.) I have included photos of both my ruby chocolate-covered version and my homemade chocolate-covered version, plus one experimental sprinkle-rolled truffle.
Note that this recipe can be significantly varied for taste and proportion. Also, the truffle centers can be formed large, medium, or small. Finally, you may or may not think of one truffle as a "serving" (it's very hard to eat just one, though they are satisfying enough that overindulgence won't be an issue - you will be satisfied without needing to scarf them all.) Thus, the number of "servings" produced by this recipe will naturally vary too much to give a reasonable estimate. I wrote 60 because that's about the number of servings I got when I did it, but that's a rough estimate only.
In the same way, the amount of prep time will depend a lot on how much of the stuff you choose to make, whether you let it set in the fridge or at room temperature, and whether or not you make any mistakes during the tempering process. I'm slow in the kitchen, I did two different kinds of chocolate coating (one made from scratch), and I had to redo the tempering a couple of times on the scratch coating to get it right. So this took me quite a while. If you're more adept in the kitchen than I am, though, it'll take you half the time it did me. Don't take the prep time listed too seriously, in short. This really isn't that difficult, it's just that some parts (like waiting for the chocolate to cool during tempering, and waiting for it to set after pouring) take some time.
4 h 60Ingredients
- It's true of cooking in general that the quality of your result depends a lot on the quality of your ingredients, but this is especially true in extremely simple recipes like this. Every single ingredient should be of the very highest quality you can afford and access.
- -Coating Chocolate-
- If you want to make this process easier on yourself, you can "cheat" and buy a premade chocolate or chocolate couverture to melt and use. I wanted to use ruby chocolate on about half of my truffles, and it's not available in a 100% cacao-solids form yet, so I bought ruby couverture directly from Barry Callebaut. The flavors in the Valentines tea are exceptionally compatible with those of ruby chocolate, and I strongly recommend trying this combination. If you prefer a traditional chocolate, however, white, milk, or dark will work just as well, and each are delicious with these truffles in their own right. If you want to be really adventurous, make all four coating versions and compare them!
- If you wish to make the coating chocolate from scratch, as I did for the non-ruby-coated truffles, you will need the following ingredients.
- - Food-grade cocoa butter (aka cacao butter)
- - Your preferred sweetener. Powdered cane sugar, honey, agave nectar, and even a liquid glucose (such as those sold for commercial food-making) will all work just fine. Do not use regular granulated sugar; if you do, the finished chocolate will have a gritty texture. (Mind, I made this mistake, and the chocolate is still delicious. It's not an unpleasant result. But it's definitely not what most people have in mind, so unless you're weird like me and enjoy it, use powdered sugar or a liquid sweetener.)
- - Vanilla extract (real if at all possible, and ideally, something special, not just your typical little brown plastic bottle. Bourbon beans, perhaps, or Tahitian.)
- - Any source of 100% cocoa solids, such as baking chocolate or bags of raw cacao powder. (Omit if making a white chocolate coating.)
- - Finally, your preferred powdered milk. Don't use liquid milk! It will make your chocolate into more of a ganache, and it will be too soft to coat the truffles (it will become more like something you would expect to use as a truffle center; I made this error the very first time I tried making homemade chocolate.) Omit if making a dark chocolate coating.
- Note that you can also make a "dark milk" chocolate by using powdered milk, but also including a relatively high proportion of cacao solids, if you want the best of both worlds. (I did this. I like it. But vegans and others who prefer not to use milk can feel free to omit it; dark chocolate need not contain any milk.)
- -Ganache Truffle Centers-
- You will need all the same ingredients as for the chocolate coating - food-grade cocoa butter, a sweetener, vanilla, and optional cocoa solids (whether in bar or powder form). I chose to use a little bit of cocoa in my truffle centers because the Valentines blend normally has cacao nibs in it anyhow, but if you prefer, you can omit this and make a more purely tea-flavored ganache.
- In addition to the chocolate ingredients, you will need:
- - Heavy cream or heavy whipping cream. Vegans can substitute coconut butter or other vegetable fat.
- - A sample package of Adagio's Valentines tea.
- As far as equipment, you will need the usual spoons, spatulas, and measuring cups, plus two double boilers - one in which to make the coating chocolate and one in which to make the tea-flavored ganache filling. A double boiler is just a metal mixing bowl set in a saucepan filled with warm or hot water. The water should not touch the bottom of the mixing bowl, but should not be too far below it either. The steam and heat from the warm water helps heat the mixing bowl and will melt your ingredients without burning or overcooking them (so long as you keep the heat on the stove appropriate).
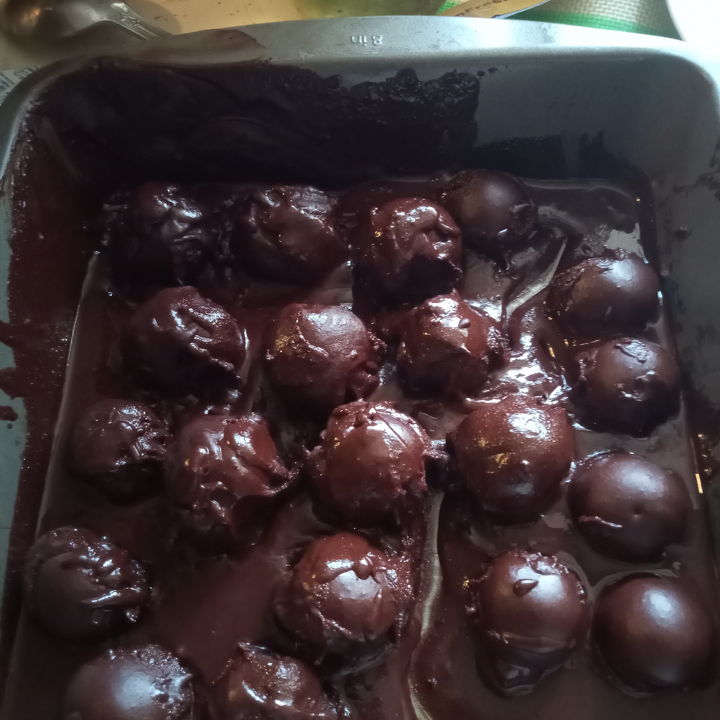
- You will also need a dipping fork, a rack and tray, truffle molds, or other tools with which to dip or mold the finished candy. Don't skip this. I tried to McGuyver this. The photos show that I did not do a good job. Learn from my errors!
- Mind you, my truffles may be ugly, but they taste amazing. ;) Still, you'll definitely want to get some real molds or dipping tools.
- Finally, you'll want a spice grinder or something similar with which to grind down the Valentines tea to a powder (can be coarse, but the finer the better for this recipe.)
Directions
Set up your two double boilers and start warming them up. (If you're 'cheating' you only need one, as you'll be making the ganache first, then melting the coating chocolate.)
While they are heating, get out your ingredients. If you're "cheating", you'll just need to make the ganache centers, then melt and temper your chosen coating chocolate according to the needs of that type of chocolate before pouring or dipping the centers to complete the truffles. Skip down to the ganache instructions. (I will cover tempering later in this article when I get to it in the course of describing how to make the coating chocolate from scratch.)
The amount of each ingredient to use depends on the result you want. White chocolate will use no cocoa solids, a lot of cocoa butter, about half as much milk powder as cocoa butter, and sweetener to taste. Milk chocolate is like white chocolate, but with cocoa solids - a milk chocolate should be at least 5% cocoa solids but can contain whatever proportion you find tastiest. Dark chocolate uses no milk powder and usually contains a greater proportion of cocoa solids than milk chocolate. Because people's tastes vary so much, I am not giving specific instructions. Decide what proportions you want the final chocolate to have and how much you want to make, and use your ingredients accordingly. For example, using one cup of cocoa butter, one cup of cocoa solids, and one cup of sweetener, with a teaspoon of vanilla, will give you a large quantity of roughly 30% dark chocolate. Add one cup of milk powder to produce a 25% milk chocolate. If you don't want to make four cups' worth of chocolate, reduce the amounts accordingly. (For what it's worth, I used 3/4 cup cocoa butter, 1 cup cocoa solids, 3/4 cup sugar, 1/2 cup milk powder, two teaspoons vanilla. This produced an unusually dark milk chocolate which I enjoyed but which might not be to everyone's taste, hence why I am trying to build variability into the recipe.)
If you're making the coating from scratch, chop up the cocoa butter (however much you've decided to use) if needed before adding it to the double boiler. Ensure the boiler is just warm enough to melt the cocoa butter - in short, no warmer than needed to accomplish that. The cocoa butter will melt down into a beautiful golden-yellow oil. If you are using a bar-type source of cacao solids, chop it up and add it to the cocoa butter. Cocoa powder can simply be stirred in. Once you've mixed the cocoa butter and solids thoroughly, add your sweetener and stir until well incorporated. Finally, add the vanilla at the end. Make sure, throughout this, that the mixture is maintained at the lowest temperature at which it will remain liquid. Try not to overheat it (though it won't be a disaster if you do - I managed to take mine all the way up to 180ish and it turned out fine, just not quite how I wanted; I began with raw cacao powder and, well, it wasn't raw anymore. But still delicious.)
When it starts to look like you just melted a bunch of chocolate bars in a bowl, you're almost done! You don't want to take the time to temper until the ganache centers are ready, though, so set the coating chocolate aside for now. You can let it cool if you want, or leave it on the boiler so long as it doesn't overheat. Either way, you'll be tempering it later, just before you use it.
-Ganache Filling-
Proceed as described above for the coating chocolate, but use a greater proportion of cocoa butter and sweetener in the mix than you did for the coating chocolate. Also, use a lot less cocoa solids if you use them at all. For my filling, I used about a tablespoon and it was plenty. You want the dominant flavor of the ganache to be your Valentines tea powder.
When you've got the cocoa butter melted and have mixed in the sweetener and any cocoa solids you'll be using, don't add the vanilla yet. Now it's time to use the heavy cream (or substitute). I used half a pint, but you can vary the amount to customize the texture of your result. I wanted my truffle centers to be quite soft, so I used a lot of cream in them. If you want a firmer center (though it will still be soft compared to the coating), you can use as little as a splash of cream. The more cream (or substitute) in the mix, the softer the final ganache will be. I do not recommend using more than the proportion I used, as any softer would be difficult to work with.
Add the powdered tea at the same time that you add the cream, or shortly thereafter. I used about three tablespoons' worth, or about half the sample package, which produced a strong but not overwhelming flavor in the finished ganache. If you really want to make it taste strongly of tea, use the whole sample pack. If you want a more subtle flavor, use less, but I don't recommend less than a quarter of the package in an amount of chocolate similar to what I used, as the tea flavor will likely be too weak.
Stir the mixture until the ground-up tea and the cream are thoroughly incorporated. Let it warm up a little - about 100-110 degrees Fahrenheit - and stir it gently while doing so. Maintain the mixture at this temperature, stirring gently, until you notice the smell of Valentines tea rising from the mixture. This means the tea flavor is now pervading the ganache. Stir for at least another minute or two to allow the flavor enough time to fully perfuse the rest of the mixture. Then remove the ganache from the heat. It does not need to be tempered, so let it cool to room temperature, then put it in the refrigerator so it can set.
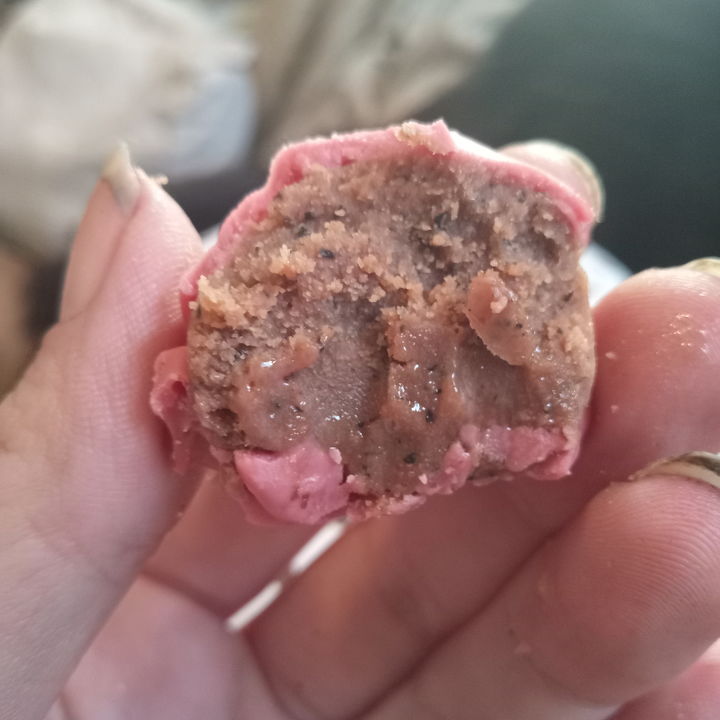
When the ganache has set, use a scoop and/or your hands to mold it into a number of little spheres or balls. You can try molding it, but if you made it as soft as I did, it won't mold very well and will need to be hand-rolled back into shape anyhow. (It's worth the extra work, though - the texture is divine.) I found that the teaspoon I bought from Adagio worked wonderfully as a sort of miniature ice cream scoop, though I often had to use the handle of a kitchen spoon to pry the balls of ganache out of the teaspoon. And then I'd roll them in my (frequently washed) hands to make them nice and round like marbles. If the ganache gets too warm and becomes tricky to work with or just too soft, simply return it to the fridge for a few minutes and it will set again.
When you have made all the ganache into round balls - in short, the soon-to-be truffle centers - it's time to temper your coating chocolate.
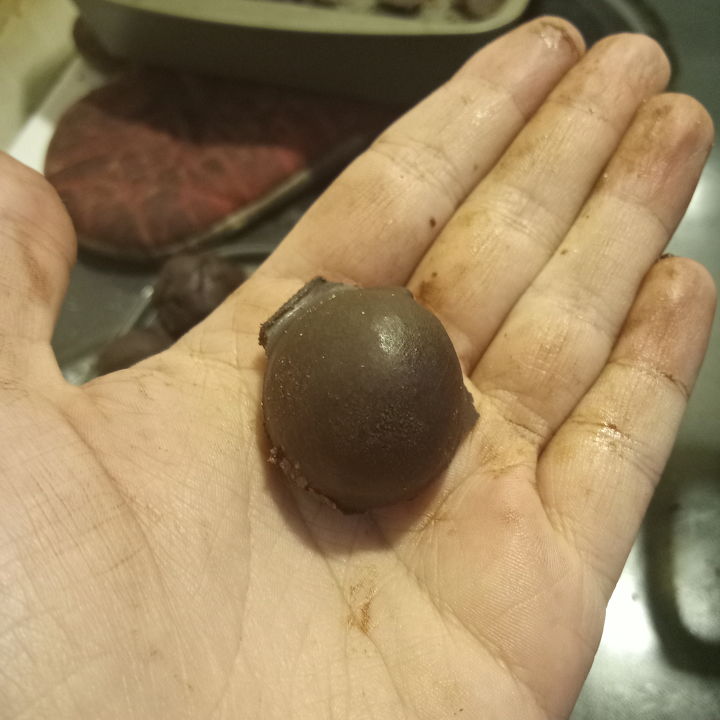
Chop up your coating chocolate and melt it in your trusty double boiler. When fully melted, bring it up to 115-120 degrees (if milk or dark) or 110-115 degrees (if ruby or white). Use a thermometer to track the temperature. Then remove the chocolate from the heat by taking the mixing bowl off the saucepan. Set it on the counter and stir gently while checking the temperature. Allow it to drop to about 82 (if dark or milk) or 79 (if ruby or white), then raise the temperature back up to somewhere between 85-87. This happens very fast - you will probably only need to put the mixing bowl back on the saucepan for a few seconds! In fact you will want to remove the bowl a degree or two before it hits 85, as the warmed metal bowl will continue to warm the mix for a little while after you remove it, which can easily lead to overshooting the mark.
If you overshoot, it's OK, just raise it back up to the original 110+ starting temperature and begin the tempering process once more. Just keep trying until you get it right. It's not as hard as it sounds, trust me! I had it down by my third try making chocolate.
Once you've brought it back up to 85-87, it's ready to use! Arrange your truffle centers on a rack over a tray and pour your coating chocolate over them, or else use a dipping fork or slotted spoon to dip them in chocolate. (I tried using a pan, as you can see in the photos, but this was not a good move. I also tried using a collander, which worked better, but I didn't space the truffles far enough apart so the result was still less than ideal. I definitely recommend getting the proper tools for this part.)
You can also mold the truffles if you have a truffle mold. Use a pastry bag, or just pour, so that each mold has a little chocolate in the bottom, but no more than about a third full. Drop one of your little ganache marbles into each mold. Press it down a bit if needed. Then fill the rest of the mold with the covering chocolate.
Let your truffles sit until they are dry to the touch. Then you can place them in the refrigerator to set, or cover them with a cloth and let them set at room temperature. Either is fine, but the fridge will be faster.
If you tempered your chocolate correctly, it will have the same familiar hard snap as storebought chocolate and it will not melt at room temperature. Once your truffles have set, you can remove them from the refrigerator and store them in a sealed container.
Remember, these truffles contain no preservatives, so they won't keep forever like storebought chocolate! It's safe to keep them at room temperature, but I suggest keeping them in the fridge so they last longer. Enjoy your homemade tea truffles!
Variations:
Use ruby chocolate callets instead of cocoa powder in the ganache.
Use Cupid's Cup, matcha, or other tea instead of Valentines.
Roll the centers in chocolate sprinkles instead of using coating chocolate.
Add dried fruit to the centers.
Add nuts, coconut shreds, or sprinkles to the outside right after pouring or dipping.


